Build Your Own Laptop: Guide And Benefits Of Building A Laptop
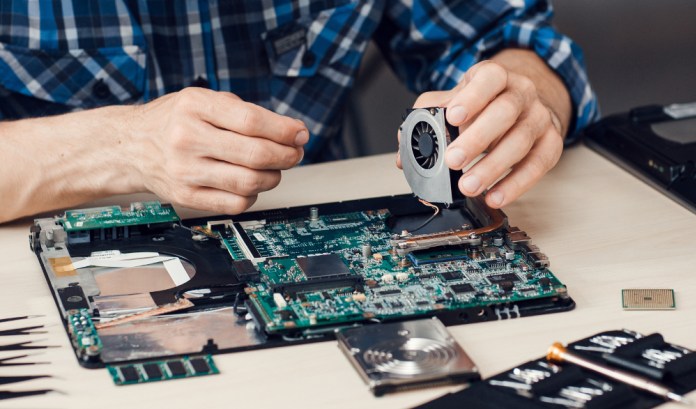
How To Build Your Own Laptop
If you’ve been searching high and low for the perfect laptop to meet your needs and are coming up short, why not build your own? It may sound complicated, but with a bit of research and shopping around for the right components, you can create a truly special machine. This guide will show you how to build your own laptop.
Tips for Beginners
Although it’s rare, sometimes a part you purchase online will arrive dead. Instead of spending all day building your laptop only to find out something is broken, use your motherboard to test each component before adding it to the new laptop. As the name implies, no two custom laptops are alike, so even if you’ve built before, it is important to plan first. You don’t want to start adding components to the motherboard only to realize you missed a part and need to back up.
Don’t forget to put plenty of thought into the fans to ensure your laptop has enough ventilation. Once your laptop is in one piece, skip the drivers and software. Unless you manage to build your laptop in one day, they’ll probably be out of date anyway. Instead, head straight to the manufacturer’s website and download them from there. Finally, don’t forget to save all the boxes and bags to the parts in case you decide to sell parts down the line.
Benefits of Building a Laptop
A custom laptop allows you to create exactly what you need. Whether you intend to use it to watch Netflix and scroll Facebook or you want a premium-quality gaming laptop, you can tailor the components to your preferences. Building a custom laptop also means you don’t need to upgrade as soon as you purchase a prefabricated one, since you’ll choose each component yourself.
Drawbacks of Building Your Own Laptop
The biggest drawback to building your own laptop is the amount of time it takes. Purchasing an in-store model allows you to set it up and start using it in just a couple of hours, but a custom design requires plenty of time since you’ll need to wait for the parts and then spend the time to put them together. Even so, if you have the time and desire to build your own model, it is an excellent project that makes you feel accomplished and provides you with a computer that is truly unique to you.
Choosing the Components
When building your laptop, you’ll choose several different components, including the processor, storage device, network card, memory and graphics card. Since these are usually interchangeable, it’s easy to choose what’s right for you without worrying about compatibility. Other components, such as the display, need consideration as well.
Processor
The processor is your computer’s brain and determines how power-efficient the system is. Processors are available in four categories.
Low Power: These are the most power-efficient and are good if you need long battery life.
Value: Value processors are affordable but are commonly only in low-end systems. However, they are acceptable if you’ll mostly be using your laptop for basic office work.
Mainstream: Most laptops use mainstream processors. These are commonly Intel i3 or i5 series processors, although AMD offers an A series that is not as popular.
Performance: Performance processors are best for high-tech media machines or gaming laptops. The best one on the market right now is the Intel i7 and offers a dual-core model.
Storage Device
The storage device is what maintains your laptop’s files. Look at the type, interface and size when choosing your internal storage. Storage types include solid state drives and hard drives. Hard drives are cheap and hold a lot of data, but they can be very slow. SSDs are faster and more reliable. The most common interface you’ll find is the 2.5″ SATA, although some are M2/PCIe style. Use the M2/PCIe if you want to use your SATA for more storage. Finally, choose a size. SSDs range from 128GB to 1TB, and hard drives are available for up to 2TB.
Display
Most people don’t consider the display when building a laptop, but it is a big part of enjoying your laptop. Look at both size and resolution. Laptops have screens that range from 10 inches to 17 inches. A highly portable laptop has a display of about 13 inches while a 15-inch display is still portable but offers better performance. Avoid 17 inches unless you intend to keep it in one place most of the time. The resolution is how many pixels your display has. Most computers have 1080p displays, which is what most software uses as well. Some high-tech gamers prefer 4K displays. These are also known as retina displays.
Memory
The memory is what stores the data for your laptop. Consider the size and speed of the memory. The average person needs at least 8GB of memory, but heavy-duty gamers or multimedia laptops will need at least 16GB. Some do use 32GB, but keep in mind that limited applications can use this right now. When it comes to the speed, you’ll need it to sync with your processor. It comes with either DDR3 or DDR4 memory, and you can determine which you need by checking the processor’s specifications.
Graphics Card
The graphics card is one of the best areas to increase performance and is available in three categories.
Integrated: Graphics cards are built right into the latest Intel CPUs and are an excellent choice for daily use and light gaming.
Gaming: If you intend to game on your laptop, choose a mobile graphics card. Currently popular is the Nvidia GTX Pascal, although they can be pricey. A more affordable option is the Maxwell GTX 980 if you don’t mind losing up to 20 percent of performance.
Professional: Professional graphics cards use 3D rendering, mathematical simulations and video editing to create professional-grade performance, but they aren’t necessary for most people.
How to Put the Laptop Together
Gather Your Tools
The best tools to use for the small components you need for a laptop are magnetic jeweler’s screwdrivers. This makes it easier for you to keep track of the tiny screws. Needle-nose pliers are important, too. They help you reach any screws you may drop into the laptop’s nooks and crannies. Use a few sandwich-type bags to keep the pieces separate the piece sand secure them so that you don’t lose them.
Ground Yourself
Remember, static is easily transferable and even a small amount of it can ruin the components of your laptop. Before you begin the work, put on an anti-static wristband.
Remove the Covering
Turn over your laptop shell so that you can see the tiny screws on the bottom. You’ll need to remove each panel, which is why it’s important to keep track of the screws. Separating them by panel ensures you don’t confuse yourself when reattaching them.
Add the Hard Drive
Remove the drive bay’s panel first and then mount your hard drive to the bracket the surrounds the drive. Using grip tape, apply pressure to the drive until the screw holes line up with the bracket. Insert the screws to secure it into place.
Add the Memory
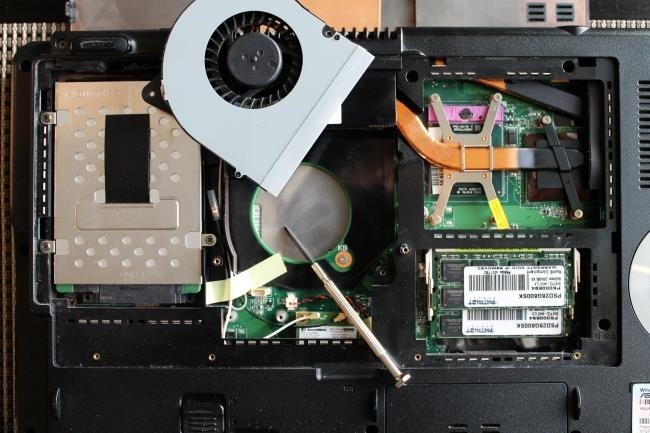
Remove the panel covering the motherboard, keeping in mind that it may be more difficult and involve some prying. You’ll find the memory slot here. Insert the memory and push on it until you hear it click in place. Memory only installs in one direction, so if you feel like you need to force it, try the other direction.
Add the Processor
For this part, you may need a flathead screwdriver to turn the socket into an unlocked position first. Once you open the panel, turn the CPU over until you see the pins. One corner will be missing them. Line it up with the notch in the socket, being careful not to bend the pins as you insert it. Lock it into position.
Add the Cooling Fan
If your fan came with the CPU, it probably already has thermal paste applied to the bottom; if it didn’t, you’ll need to apply paste first. After applying the paste, line the exhaust up with the vents in the shell, being careful not to force it. If there is a bay for the fan’s dust filter, place it in proper position, angling the heatsink until you determine the correct position. Finally, attach the power cable to the motherboard. Once you install everything, you can screw the panels back into place.
Start Your Newly Built Laptop
After inserting the battery, boot up the computer. First, run Memtest86+ to ensure the memory is working properly. You can download it to a USB on a different computer and run it from the USB. If this isn’t an option, you can also check the Hardware or Monitor section of your computer to read the BIOS.
Congratulations, You Just Built Your Laptop!
Once you turn on the computer and ensure the memory is working, you can install the operating system and the drivers. If you choose to use Microsoft Windows, keep in mind that you’ll need to pay for it. Linux is free and secure but may be more complicated if you have never installed an operating system before. Most drivers will install automatically. If they don’t, head to the manufacturer’s website. Congratulations! You now have an excellent computer that you built entirely on your own.




Hi Renar,
Glad I found this site. Assembling a laptop has always been on my mind for a while now and I’ve wanted to do it. My only problem was I don’t know the best components to use. I mean, which processor versus which motherboard or even power supply. Could you possibly do an assembly for laptops article? It would help a lot