How To Use an External Hard Drive Without Any Special Software
In the digital age, we are presented with countless handy tools for using our computers, laptops, or any other device. Although these software tools are all there to help us, ironically, the sheer amount of software for backing up, encrypting, or recovering data can become much more confusing than not having any.
This is why many people use only the bare minimum of default options to handle their data. Whether you are one of these people, or just don’t have enough time to learn about other programs, it’s important to know how to use these default tools to their fullest potential.
The Basics
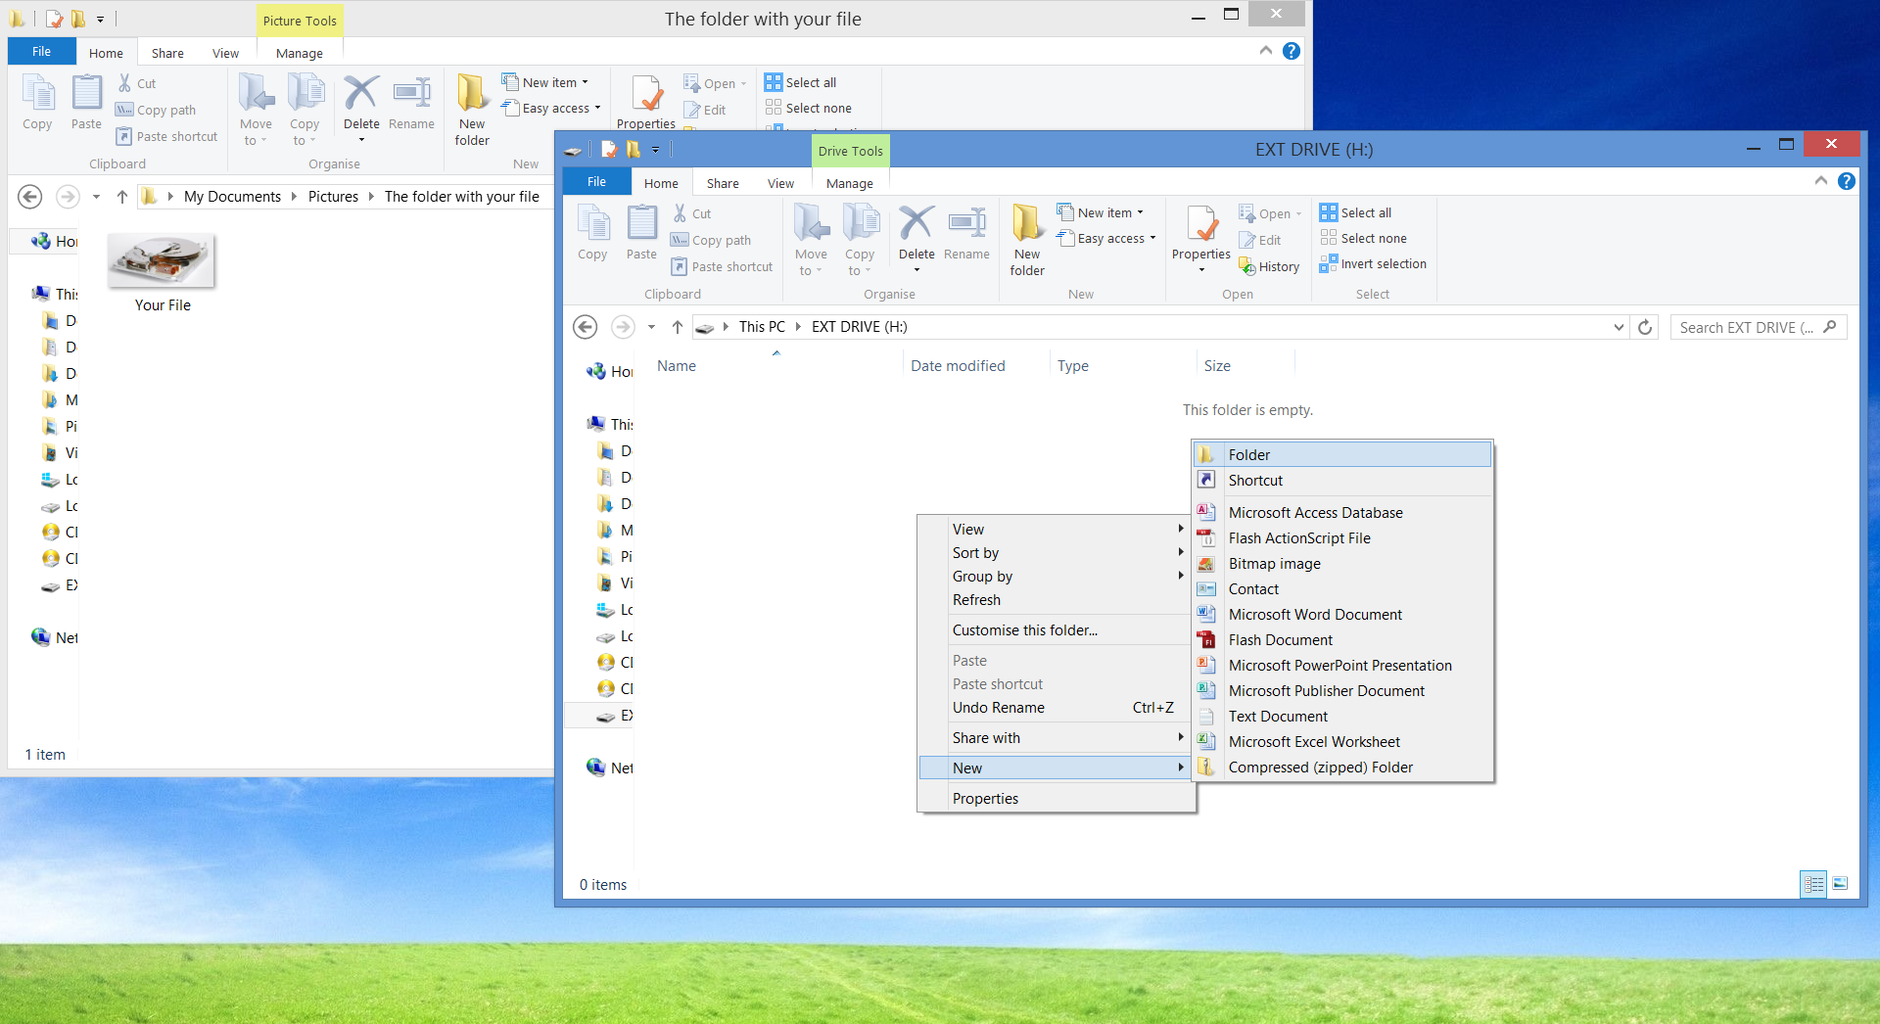
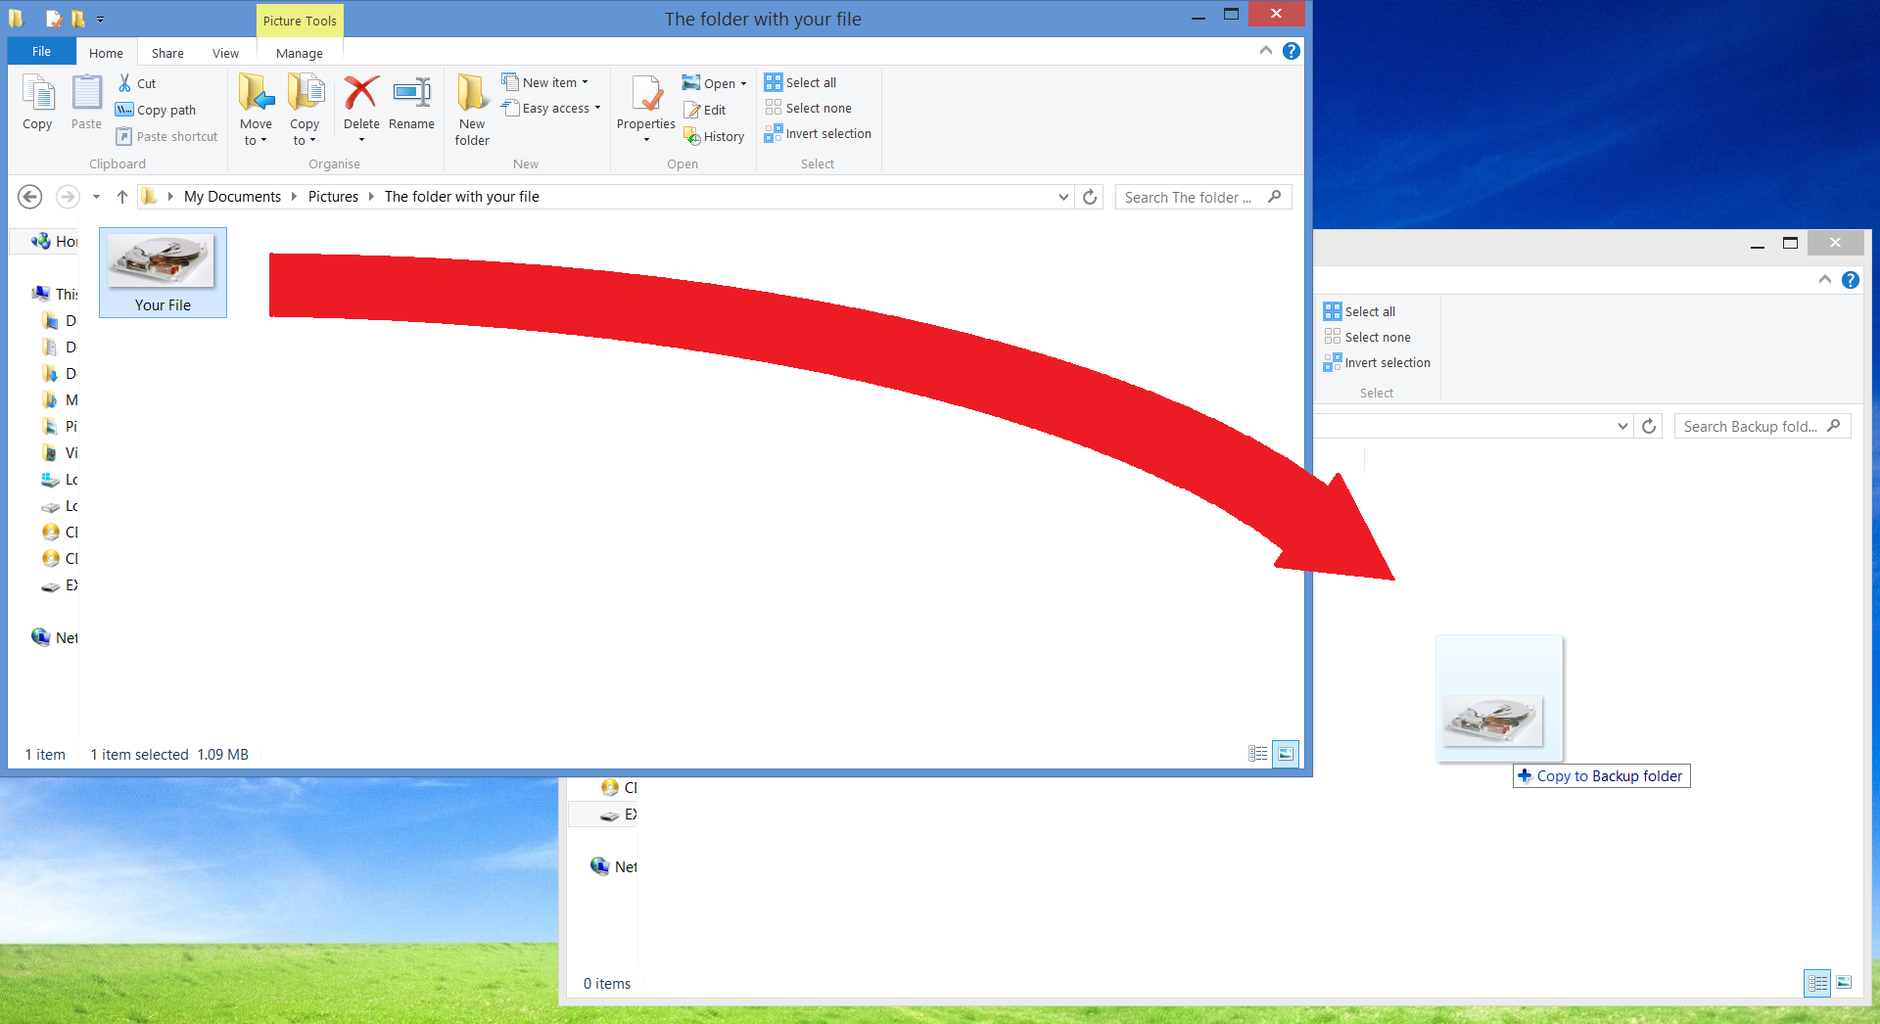
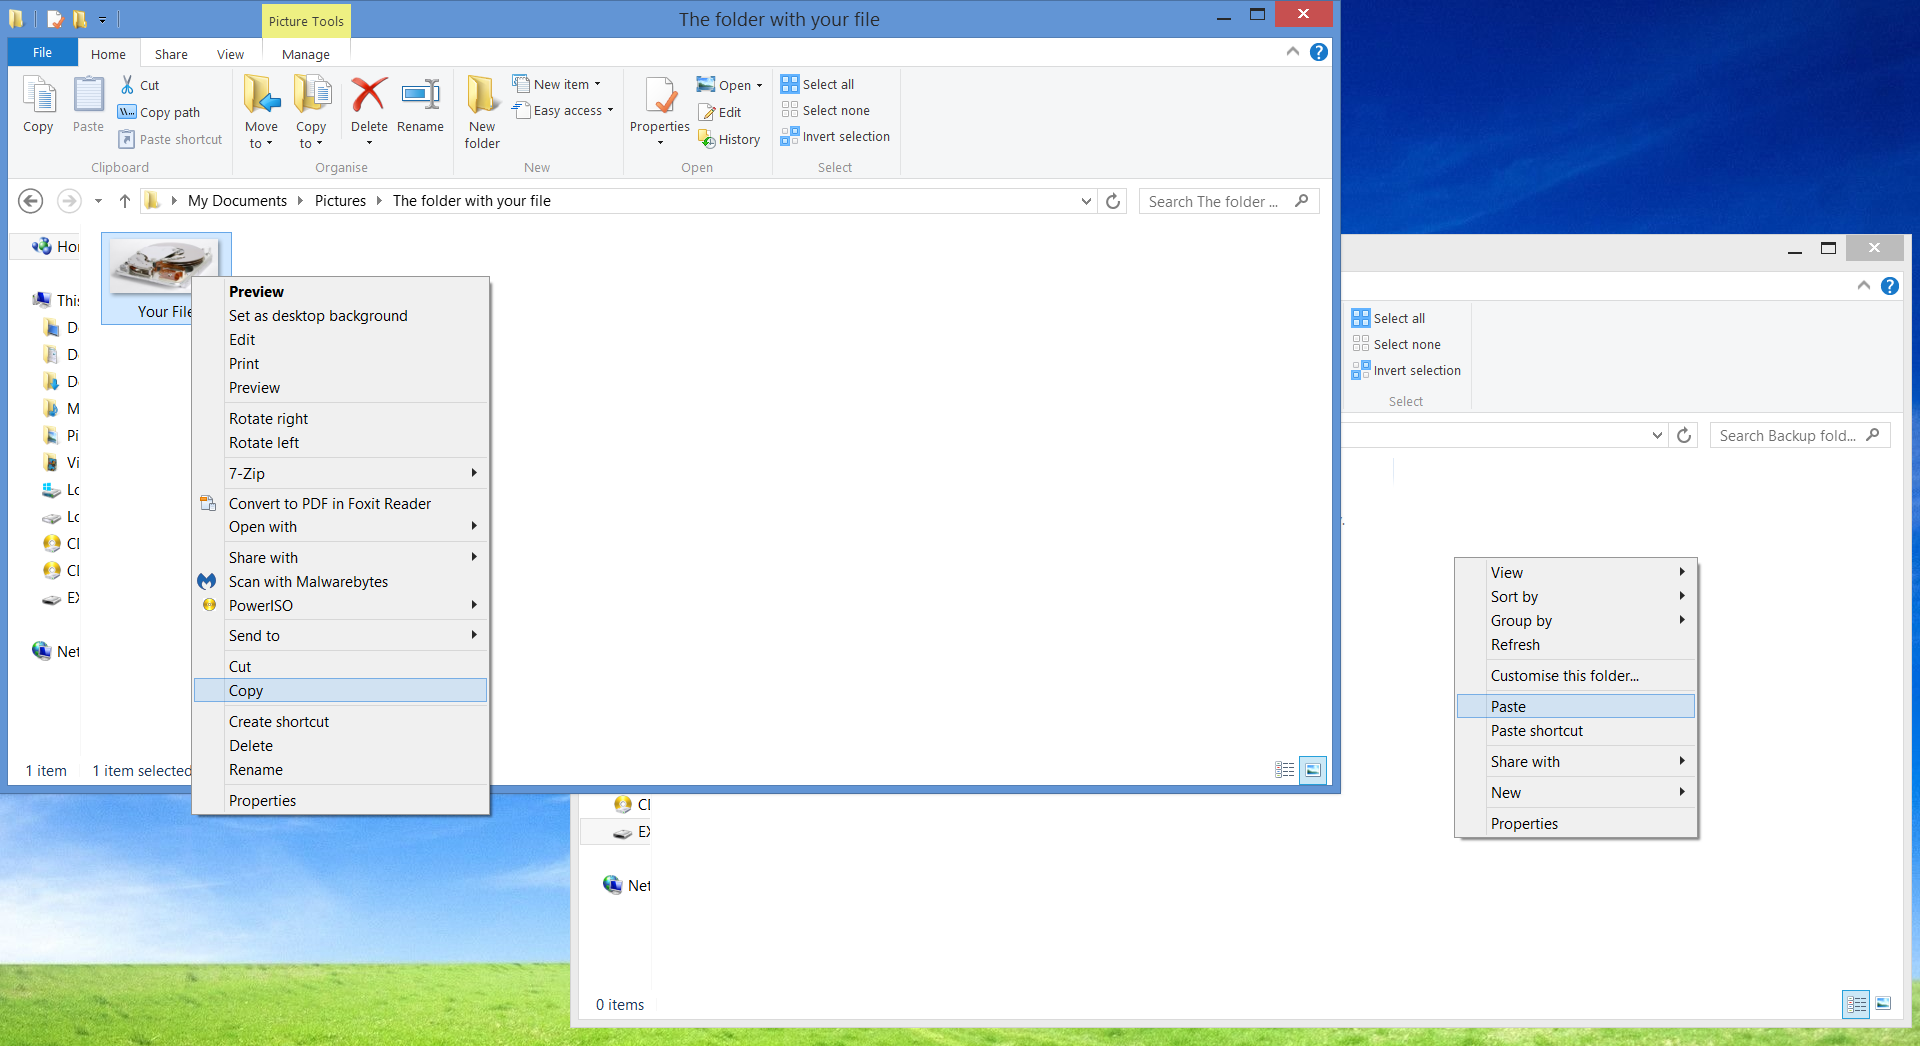
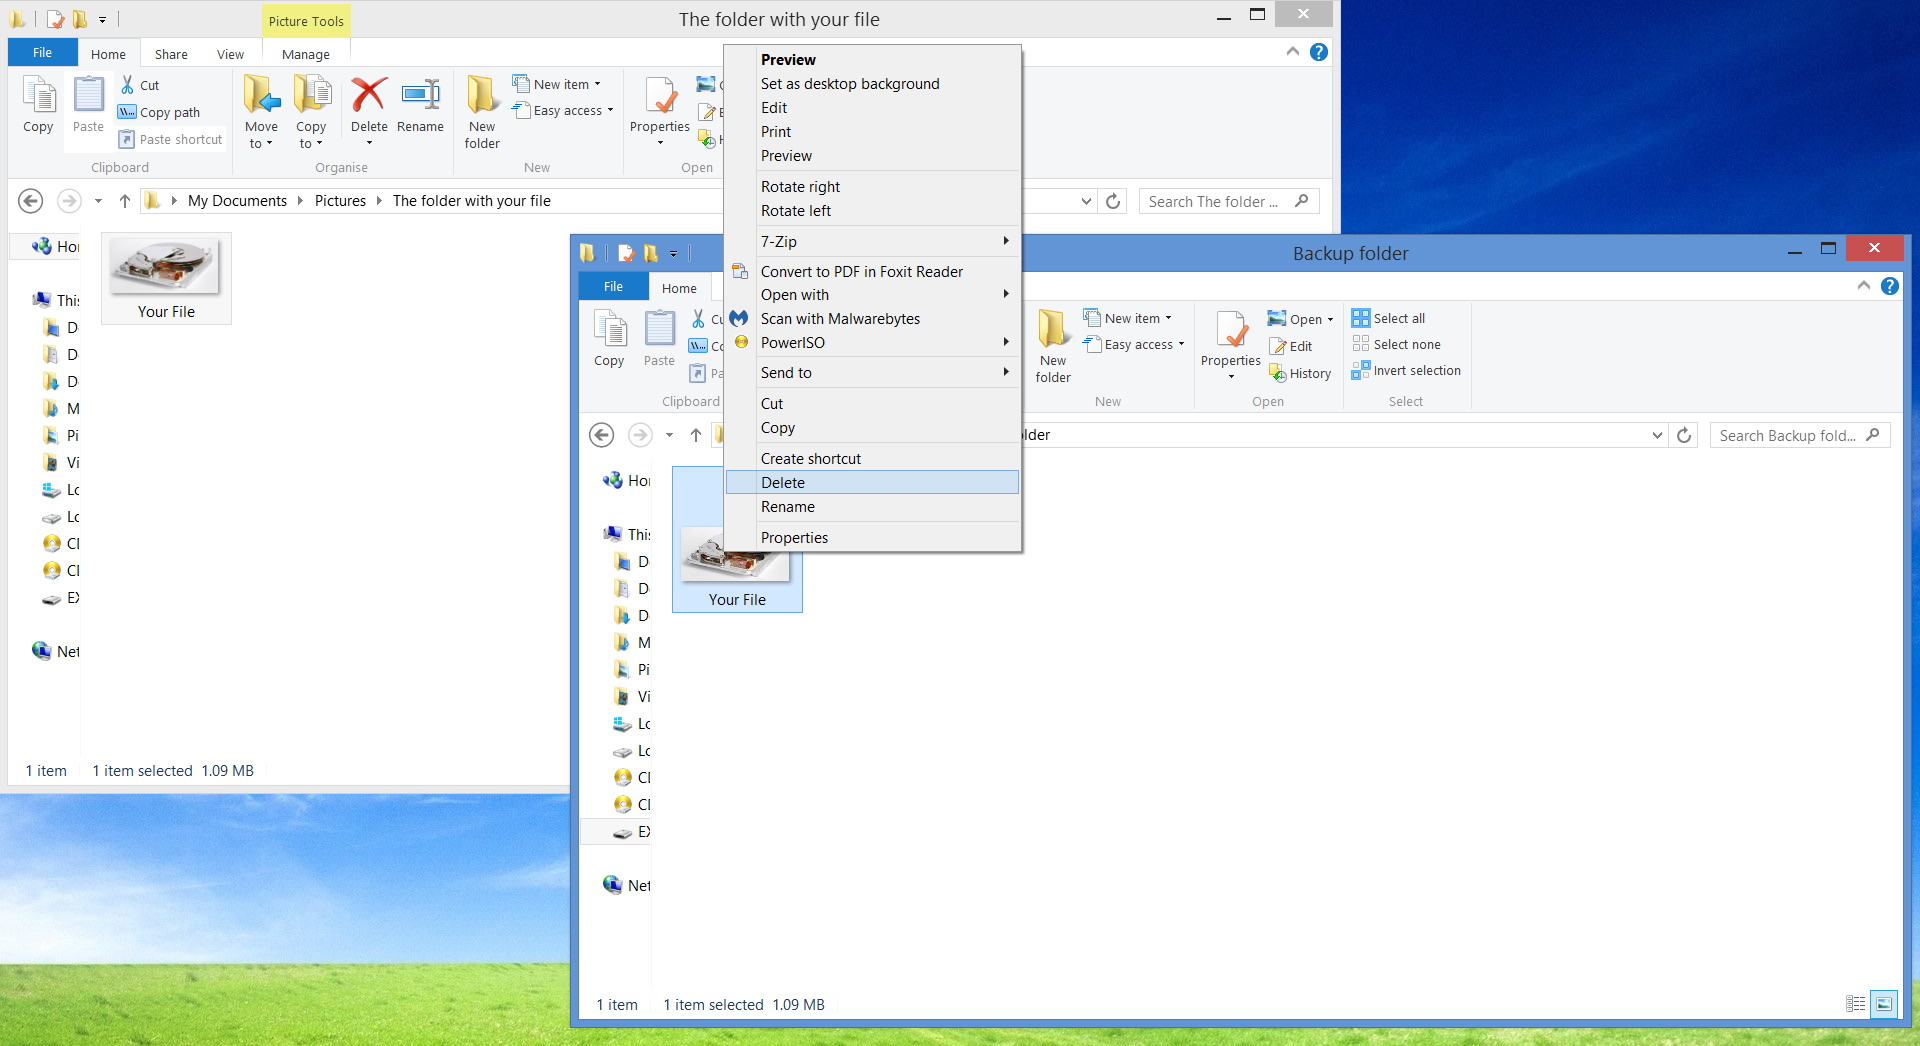
Firstly, we will discuss the most basic actions of copying or moving files to your external hard drive. If you have any basic computers skills, you can easily skip this part.
Automatic Data Backup
While most external hard drives from the largest manufacturers, like Seagate or Western Digital, come with a pre-installed backup software, you can also use the backup options that your operating system offers. Both Windows and Mac have their own inbuilt backup software.
You may have heard about Apple’s Time Machine backup software, since many of their own products, like the Time Capsule, are being marketed for use with this software. Windows also has its own backup tools – File History for Win 8 & 10, and Windows Backup for Win 7. We’ll now go through each backup tool and the basics of using them.
Using File History (Windows 8 & 10) for backup
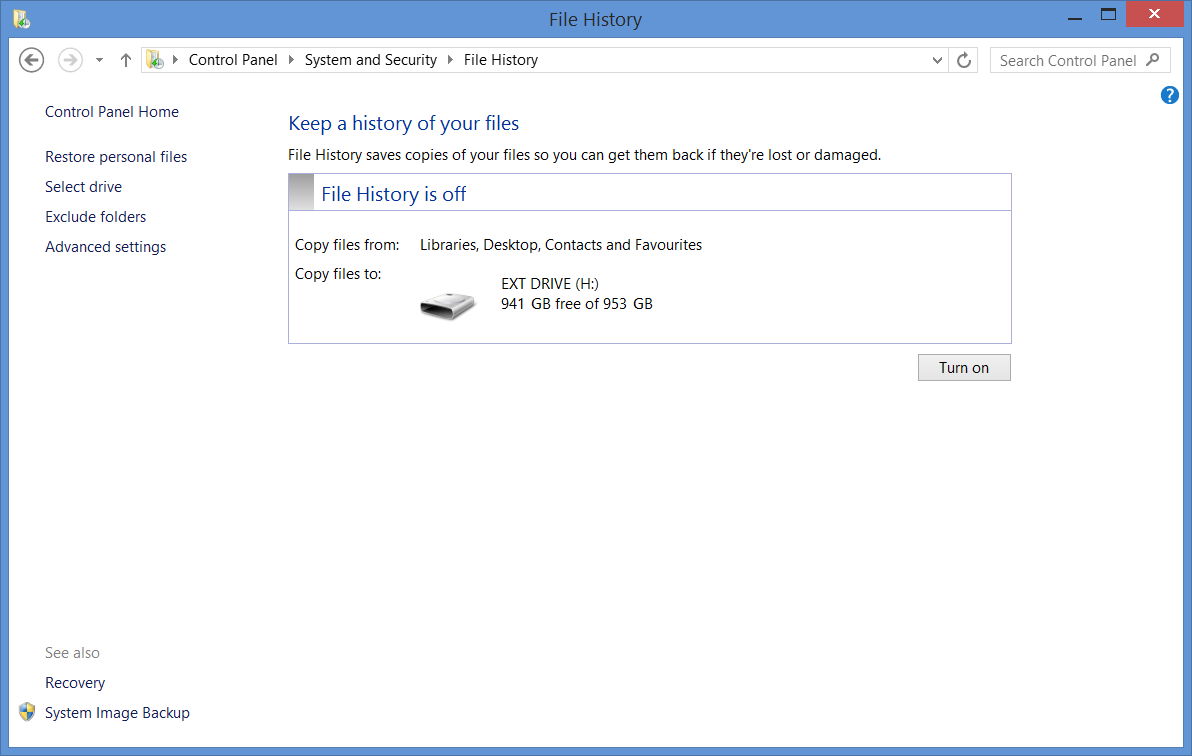
1. Go to Control Panel > System and Security > File History. You can also access it in the Settings app in the Start Menu, under Update & Security > Backup.
2. Set your external hard drive as the backup drive. Make sure it has enough space for all of your data a couple times over for safety.
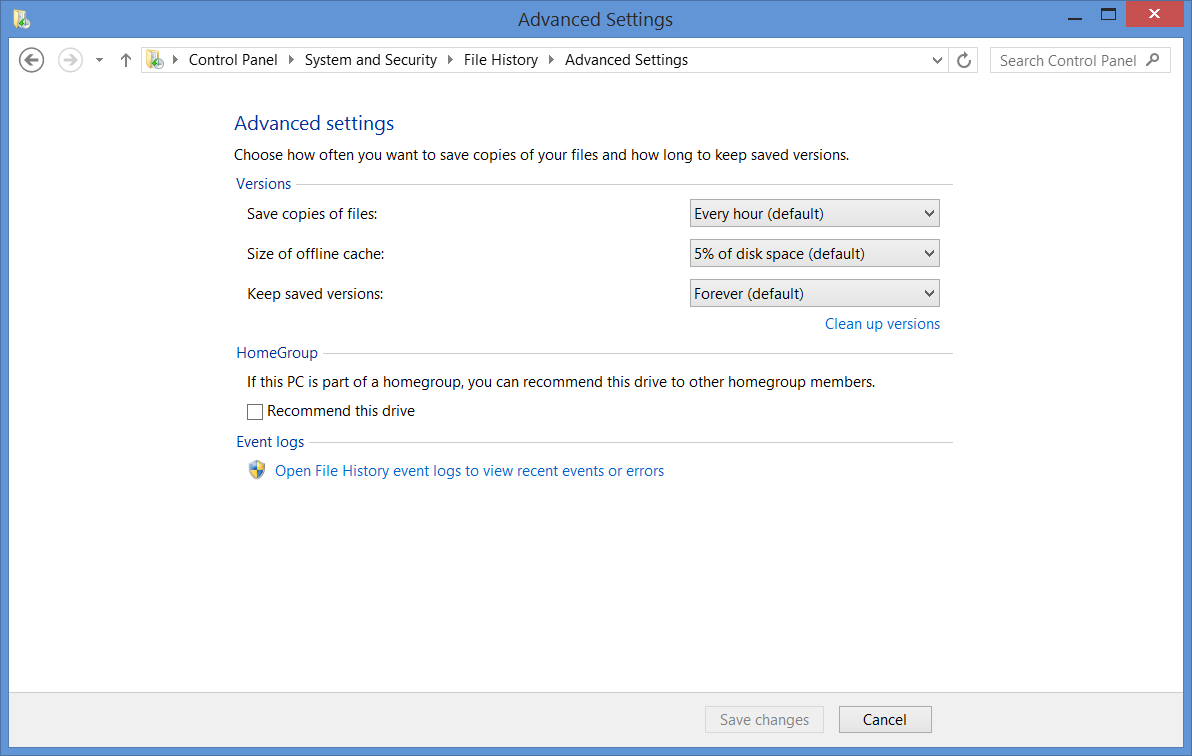
3. Customize the backup process via the Advanced settings and Exclude folders options. Here you can pick how often files get backed up and how long their copies are being stored. Some versions of File History will give you an Offline cache option, which is basically a temporary storage for new versions of files for when your backup drive isn’t connected. Exclude folders lets you browse and, well, exclude folders.
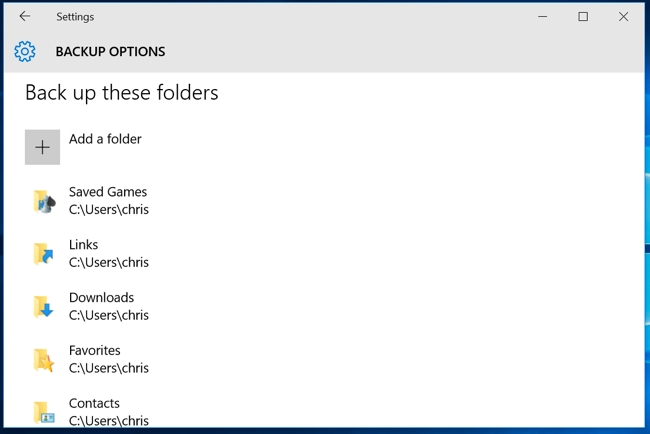
4. Add more folders to the backup list in the backup options (Windows 10). If you’re on Windows 8, though, you’ll have to add those folders to a library, which is described in detail in our File History and Windows Backup walkthrough.
Using Windows Backup (Windows 7)
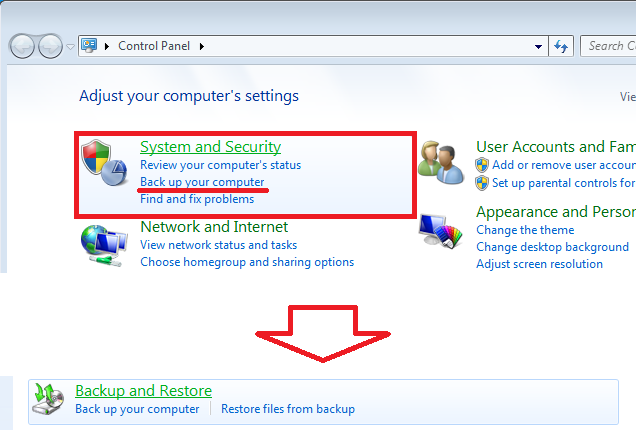
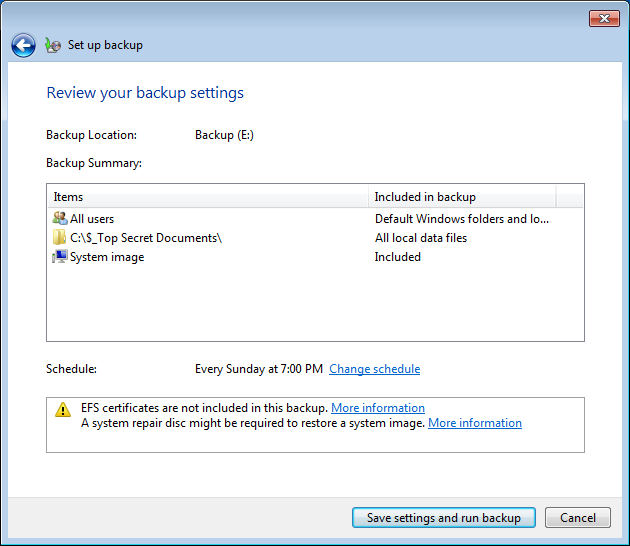
1. Go to Control Panel > System and Security > Backup and Restore.
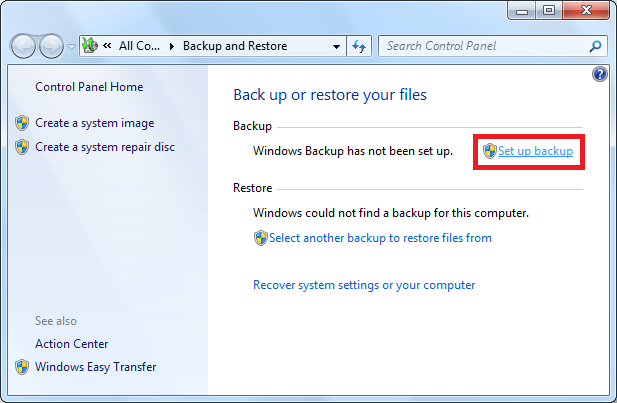
2. Click Set up backup and pick your external hard drive from the list.
3. Choose between a default backup or a custom one.
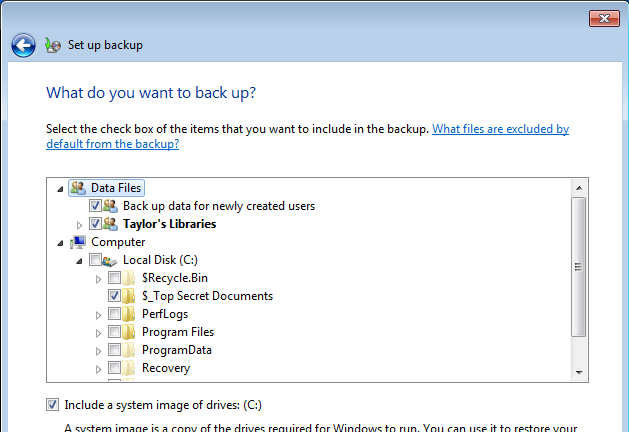
4. Set up a backup schedule.
Using Time Machine (Mac) for backup
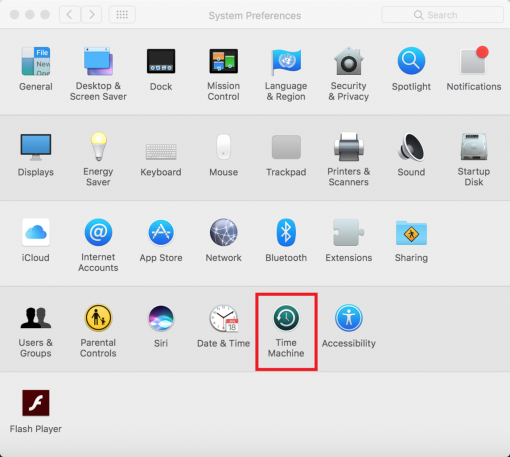
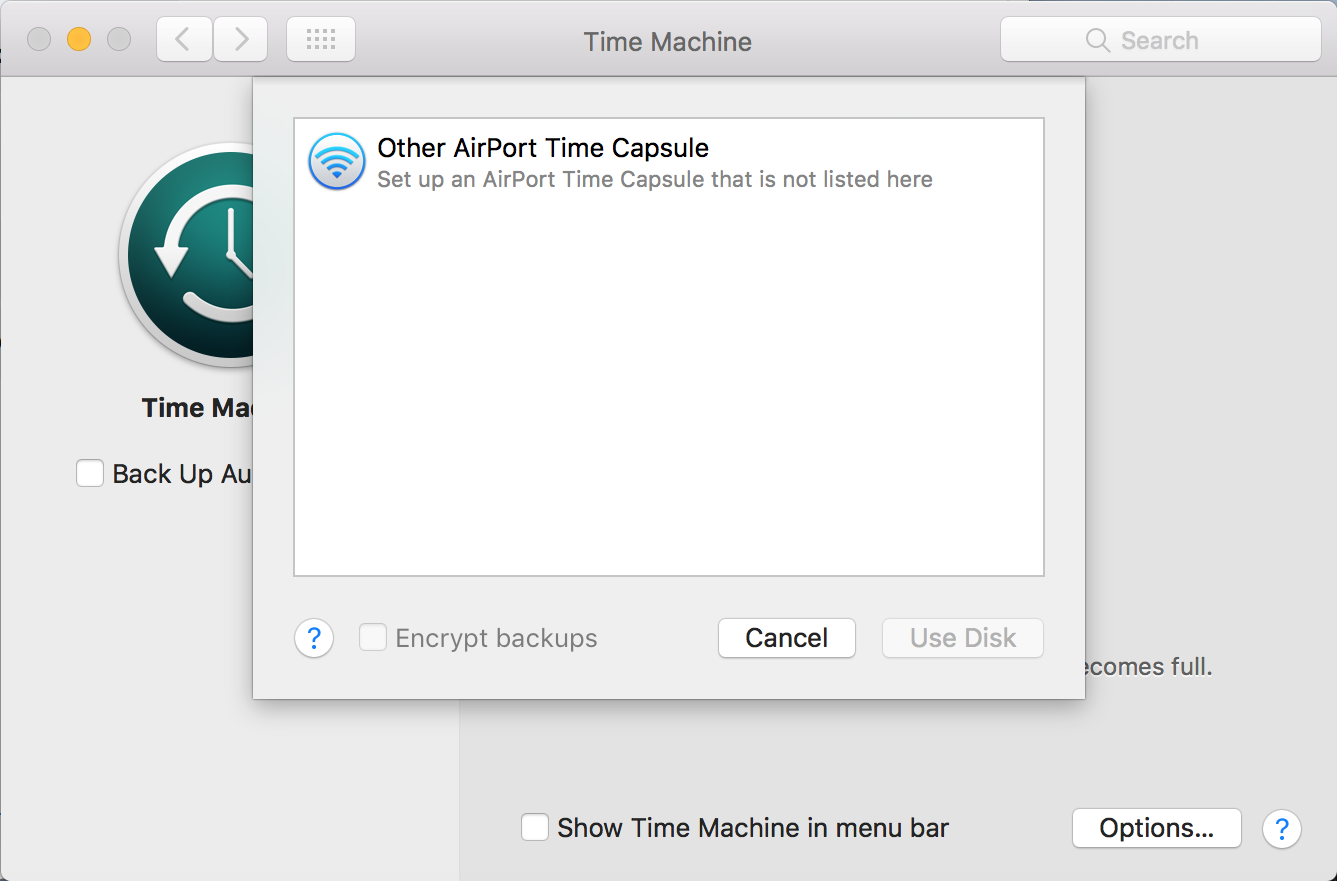
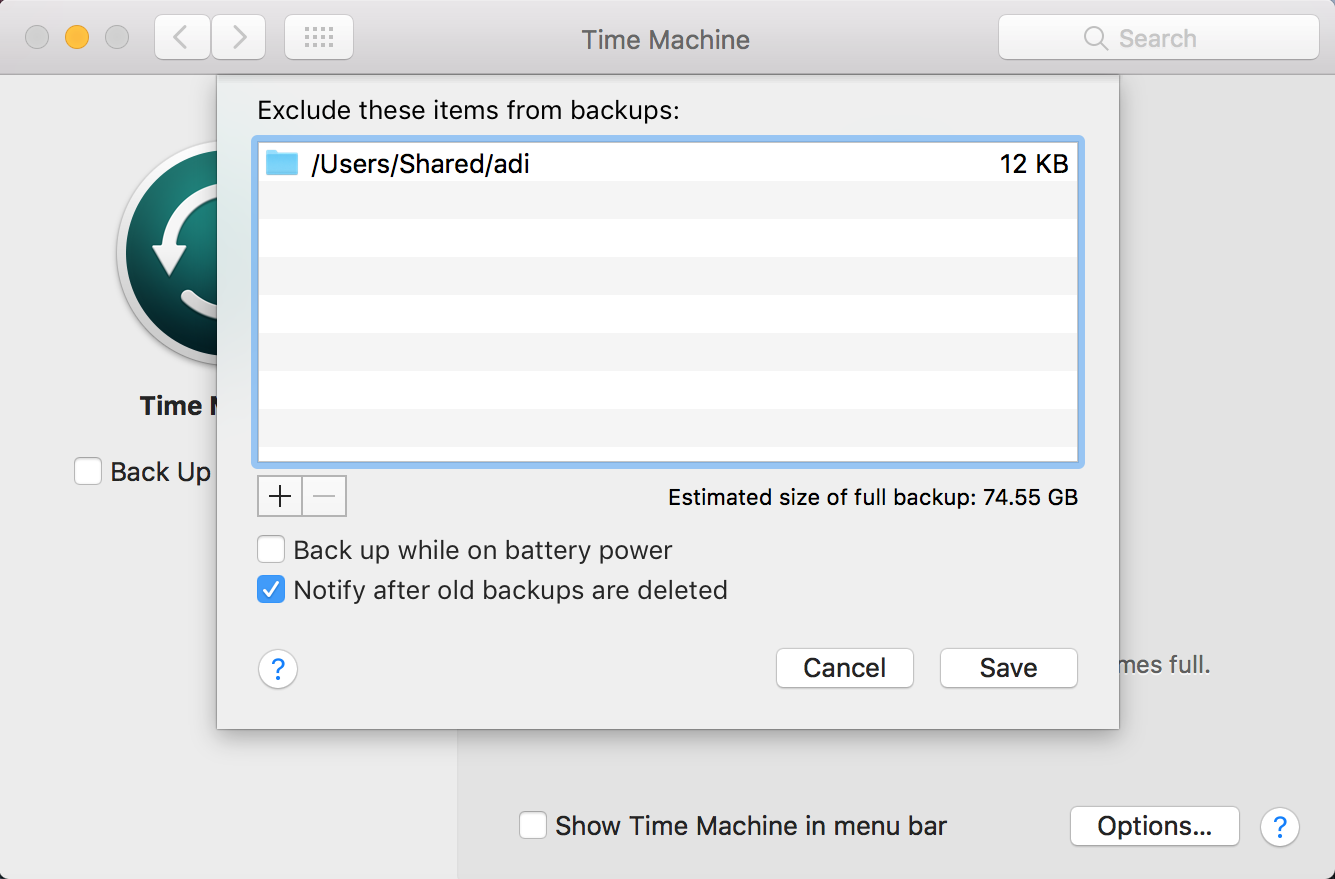
1. Open the Time Machine by clicking it in the Preferences window. Time Machine might already be in your menu bar, in which case, right-click it and choose Preferences. Pick an external hard drive for backup.
2. Customize what folders should be backed up in the Options menu. Unfortunately, there are no more customization options. A backup will be made every hour, with a multitude of backups being stored for safety.
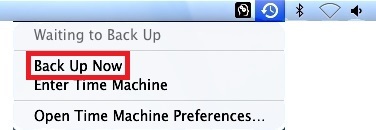
3. Right-click the Time Machine icon in the menu bar and choose Back Up Now to perform a manual backup. Turn off Time Machine in the Preferences menu, if you want to perform only manual backups. In the Preferences menu, make sure that Time Machine appears on your menu bar.
Encrypting Your Data
With our lives moving more and more into the digital world, we begin using computers to save personal files or even confidential information on our computers. To make sure that this information is safe, you need to encrypt it. Encryption basically scrambles the information on a drive so that it can’t be recognized if stolen unless you have a key/password that unscrambles the data.
Luckily, for users who don’t want a million programs on their computer, there are also native encryption and password protection options for your external hard drive on both Windows and Mac.
Encrypt your external hard drive on Windows with BitLocker
First things first, not all Windows operating systems come with BitLocker, only professional/ultimate and enterprise versions of Windows Vista, 7, 8, and 10 have this safety tool.
To encrypt and password-protect an external drive, open BitLocker from Control Panel > System & Security > BitLocker Drive Encryption. Then find your external hard drive in the list of Removable data drives and click Turn on BitLocker. Then follow these steps:
- Tick Use a password to unlock the drive, choose a secure password and make sure you can remember it
- Choose how you want the recovery key to be saved (Microsoft account, in a file, or printed out). Printing it out would be the safest option, just make sure you don’t lose it. The encryption key is what actually protects your data, and will give access to the encrypted files even if you forget the password.
- Choose how the drive is encrypted – Encrypt used disk space only for new drives (will encrypt future files as well), or Encrypt entire drive for drives already in use (more reliable encryption for existing files).
- On Windows 10, choose encryption mode – New encryption mode if you’ll use the drive only with Windows 10 (more secure option), or Compatible mode for it to work on older versions of Windows.
- Encrypt the drive, remember the password, and keep the encryption key safe.
Encrypt your external hard drive on Mac
Encryption is much simpler in Mac OS X – all you have to do is right-click the highlighted external hard drive in the Finder, pick Encrypt “Drive name”, choose a password, and wait for the data to be encrypted.



![WD My Passport Ultra Review [2018]](https://hddmag.com/wp-content/uploads/2015/03/WD-My-Passport-Ultra-Portable-Featured-768x386.jpg)
![Top 6 Fastest External Hard Drives for Xbox One [2018]](https://hddmag.com/wp-content/uploads/2017/05/fastest-xbox-one-external-hard-drive-768x512.jpg)
![Seagate Backup Plus Ultra Slim Review [2018]](https://hddmag.com/wp-content/uploads/2017/08/Seagate-Backup-Plus-Ultra-Slim-Review-Featured-768x353.jpg)