How to format a flash drive
Sometimes when your storage device fills up with unnecessary files, corrupt files or you just want to change the file system the only solution is reformating your drive. USB flash drive formatting is not different from formatting any other drive like an external hard drive. First, you need to know what File System do you need: NTFS, FAT, FAT32 or exFAT. Then you can change options like Allocation Unit Size and Volume Label, but what do these different options do? We will guide you through formatting process of your USB flash drive on Windows and Mac machines.
Formatting USB Flash Drive on Windows
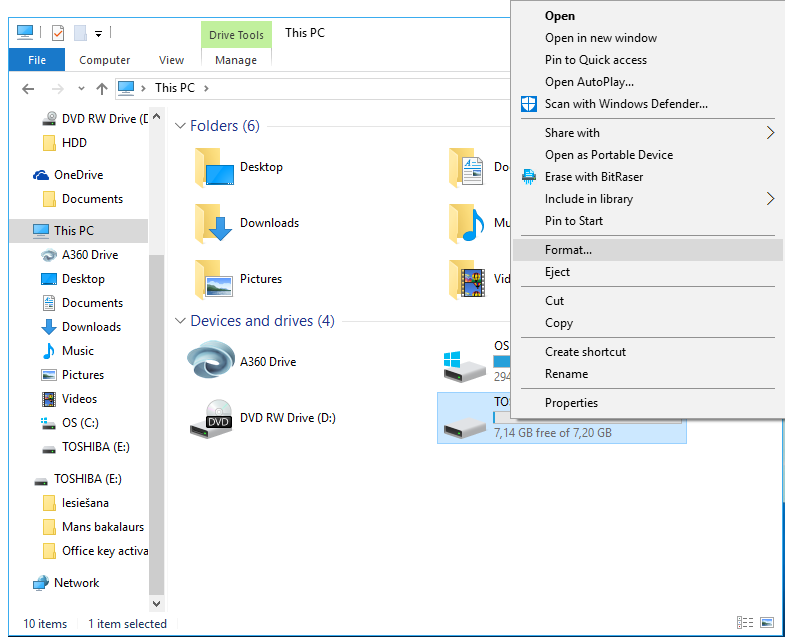
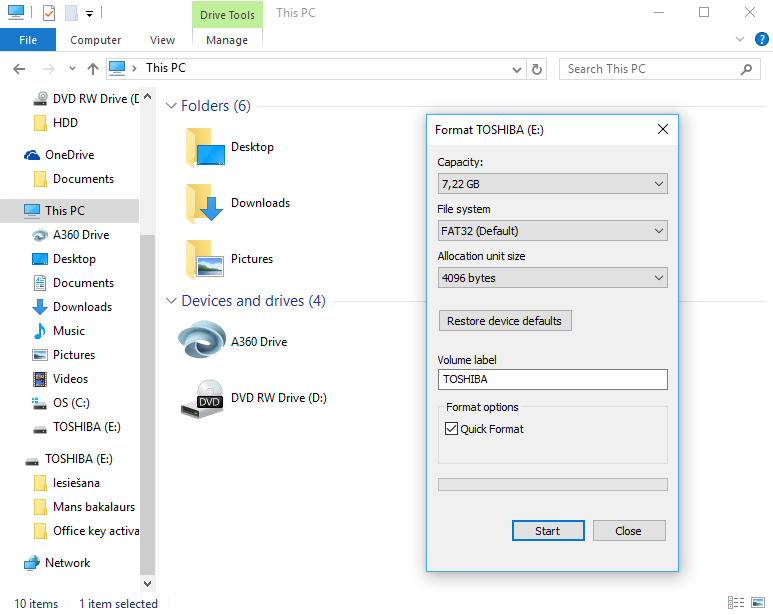
- Steps how to format your flash drive doesn’t change whether you have Windows 10, Windows 8, Windows 7, Windows Vista or even Windows XP. First, you have to plug in your USB drive into any USB port (doesn’t matter if it’s USB 3.0 or USB 2.0). Once that’s done go to File Explorer – > This PC. Under Devices and drives, you will be able to see all storage devices on your PC. Right-click your USB flash drive and click format.

- You will see a Window saying “Format <your drive>.” It shows its capacity, file system in which you want to format your flash drive and allocation unit size as well as Volume label. What each of these options does, I will explain below.

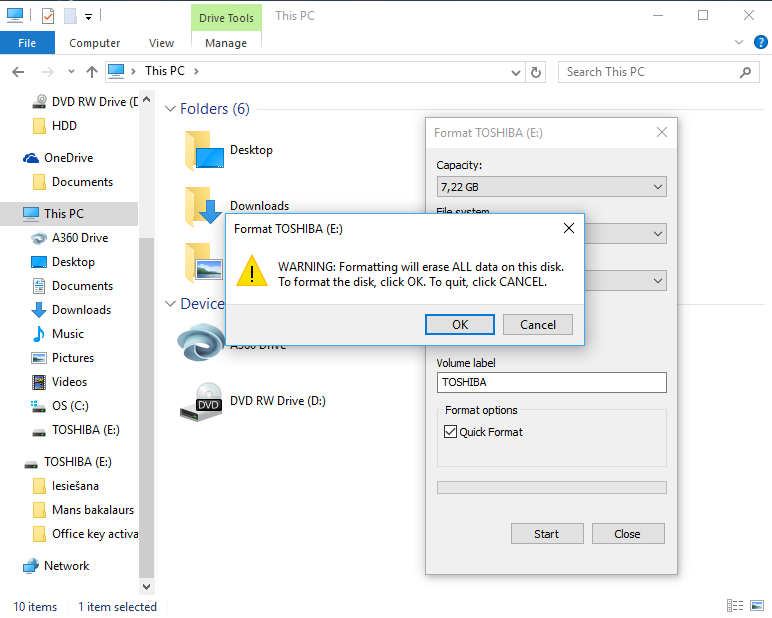
- If you want to leave everything as it was by default on your thumb drive, just press Start. The window will appear asking do you really want to format your drive. Click OK.

- Once formatting is done, you will see a window notifying you that format is complete.


How to choose the right File System?
In format window, under file system, you can choose one of four file systems: NTFS, FAT, FAT32 or exFAT. In fact, won’t see FAT and FAT32 if your USB flash drive is larger than 32GB. You ask what is the difference between these file systems? Let’s find out!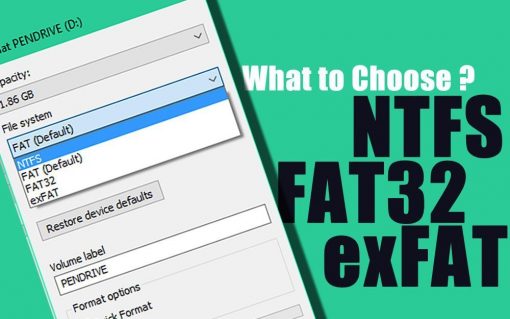
NTFS VS FAT and FAT32
- Used for reading and writing files larger than 4GB up to maximum partition size
- Can create partitions that are larger than 32GB
- Saves disk space by compressing files
- Can add user permissions to specific folders and files
- Wastes less space by allowing more clusters on larger drives
FAT and FAT32 Pros compared to NTFS
- Compatibility with almost every system – PC, Mac, PS4 and so on
- Uses less space on USB flash drive
- Performs faster and uses less space by doing less writing operations
exFAT VS FAT and FAT32
- Used for reading and writing files larger than 4GB
- Manages space better, uses less fragmentation
FAT and FAT32 are more suitable for drives that don’t exceed 32GB. You shouldn’t store files larger than 4GB on this drive. Basically, this means that if you want to format a drive that has a greater capacity of 32GB, choose NTFS. On the other hand, because the way how NTFS file system works, it is not recommended to use it with a flash drive. You can use NTFS files on Linux but to get it working with Mac, you will have to get a third-party software. exFAT works with Mac and PC, for Linux it will require special drivers.
When considering in which file system your going to format your drive, keep in mind that only FAT and FAT32 file systems are compatible with any operating system.
Allocation Unit Size, what’s that?
Drives on which you store your data are set in clusters. The allocation unit size is a value that describes the size of a single cluster. File system works by recording each clusters state – whether it’s occupied or free. When you write a file into your flash drive, the file is written into a cluster. Now it’s occupied whether there still is free space or there isn’t.
Large clusters tend to waste more space on your drive, on the other hand, small clusters makes the drive more fragmented in the result slowing it down. Choosing the right allocation unit size depends on the purpose of your USB flash drive or what you want to do with it. If you’re going to store large files, you probably should choose a large cluster size so you can have faster transfer speeds. If you are mainly operating with small files, choose smaller cluster size to reduce wasted space.
Volume Label
A Volume label is nothing more than a name of your drive. It won’t change anything in your drive’s performance and is completely optional. However, with different file systems, different characters are available.
For NTFS you can use a name that’s no longer than 32 characters and everything will be shown with uppercase and lowercase.
For FAT you can use a name that’s no longer than 11 characters and everything will be shown as uppercase. You can’t use these symbols: , ; :[ ] / \ | + =* < > ?
Optional
At the very end of Format window, you can see a “Quick Format” box. If this box is checked, all files are removed and the flash drive is not scanned for possible bad sectors. If you have time to wait, uncheck “Quick Format” box and not only all files will be removed, but also scan will be performed.
Formatting USB Flash Drive on Mac
You can also format you flash drive from a Mac. Many storage devices on the market won’t work with Mac out of the box. You will have to format them to Mac OS Extended filesystem for full compatibility. At first sight, you may think that you don’t need any formatting as your Mac will read file systems like FAT, FAT32, ExFat, and NTFS just fine, but you won’t be able to write anything.
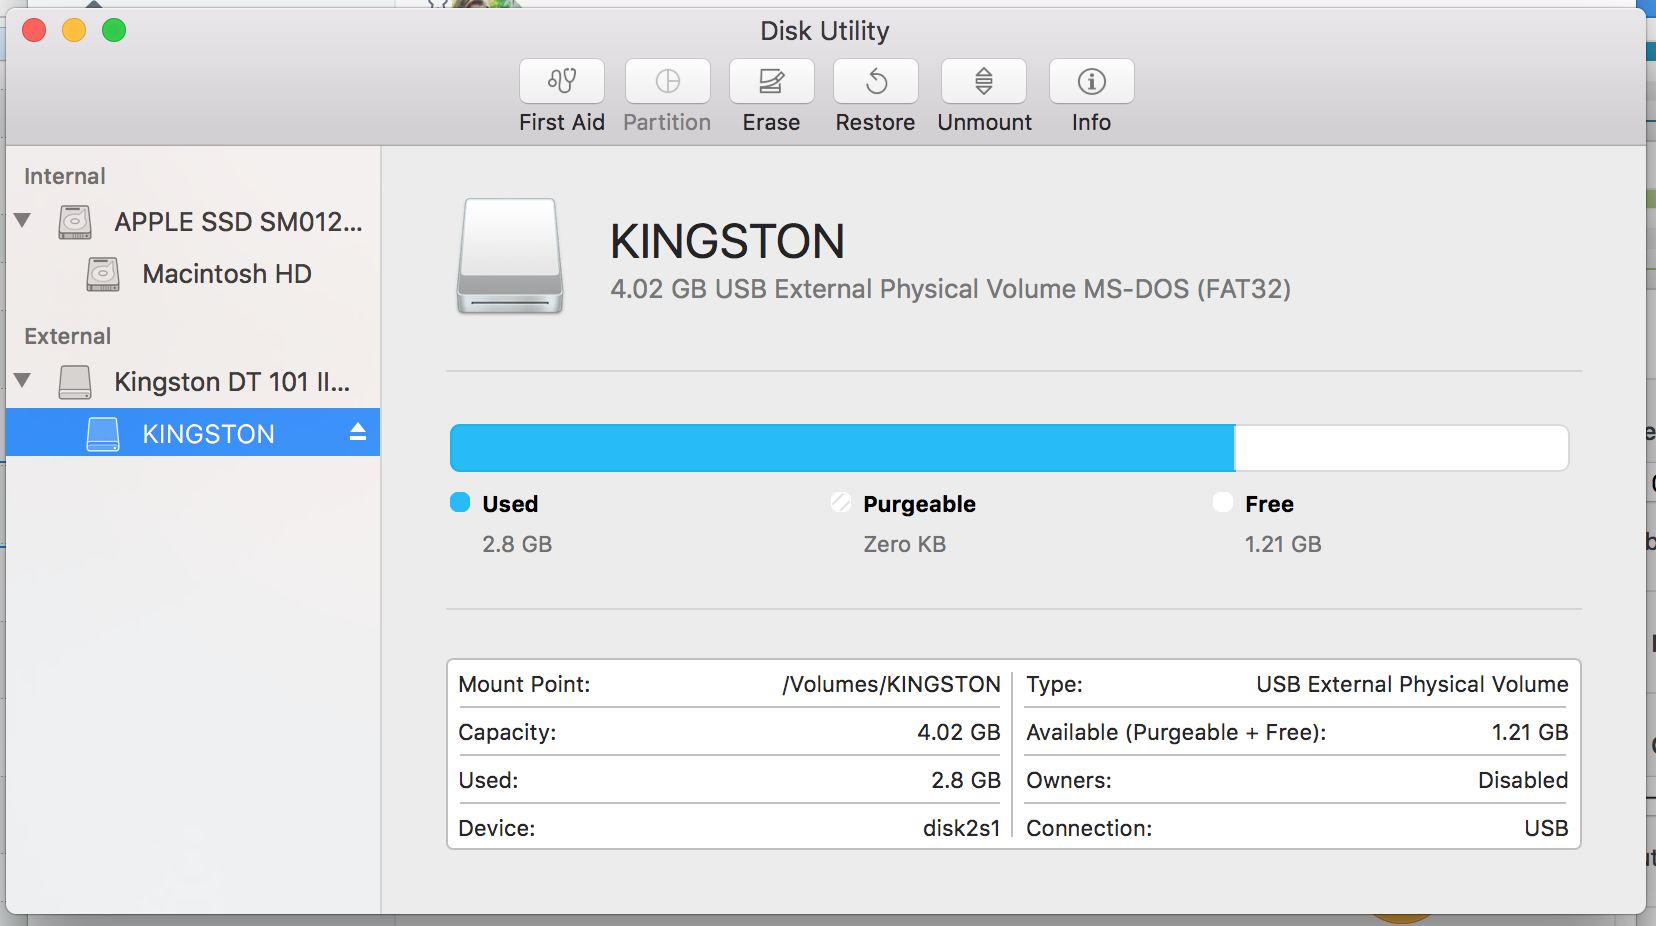
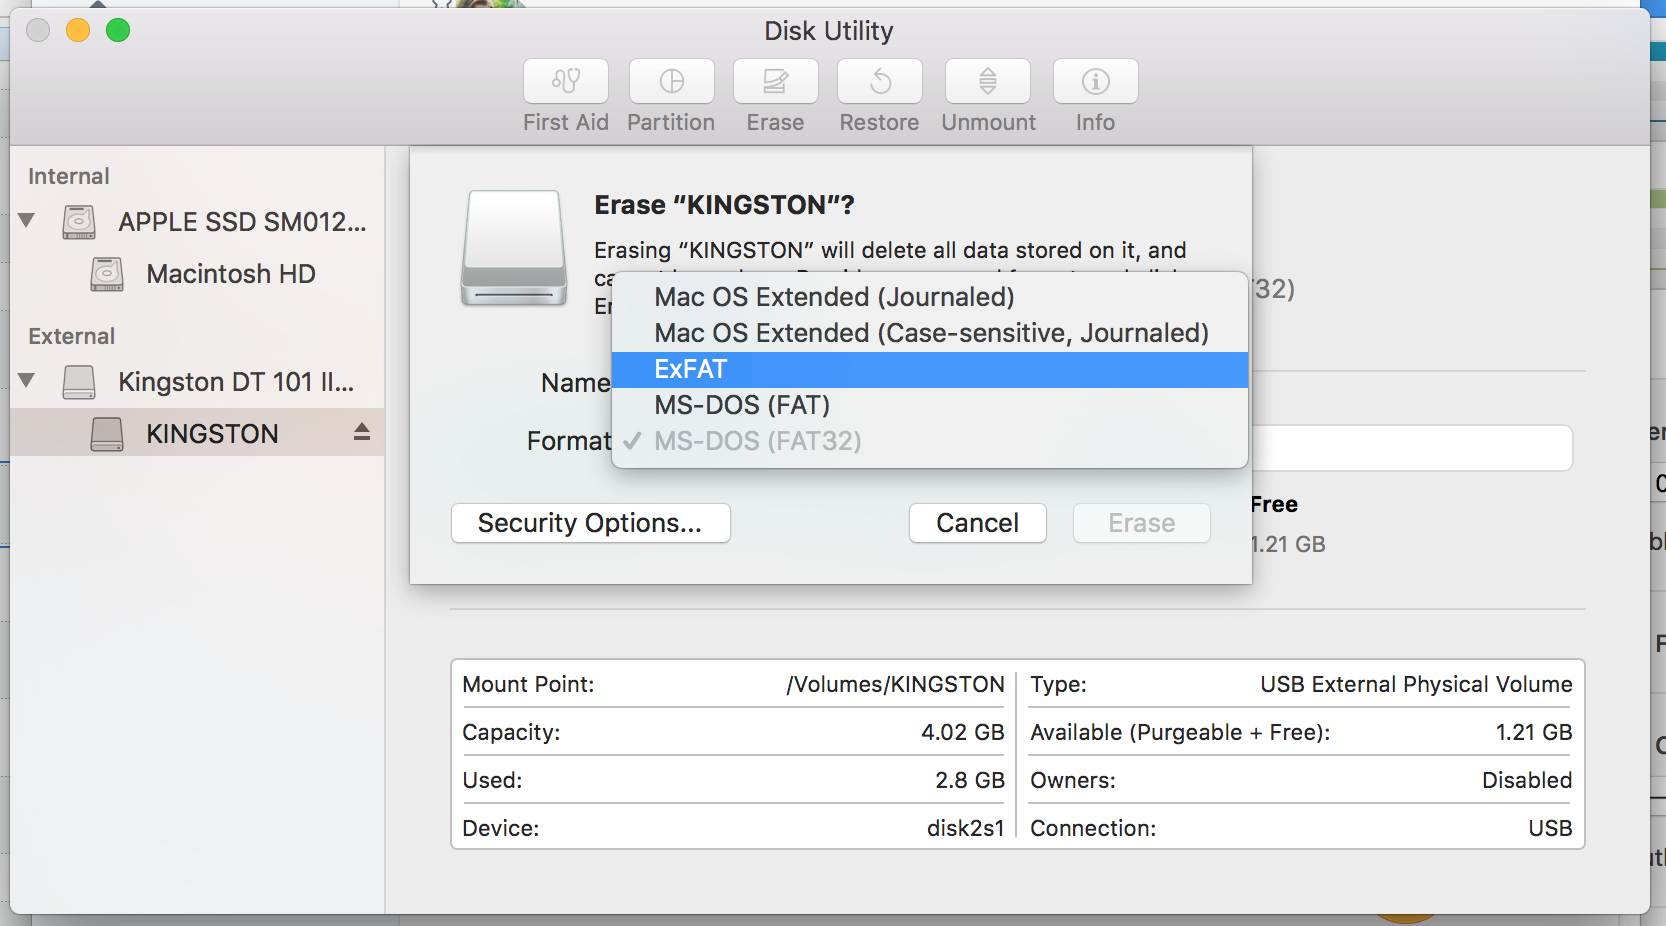
- The first thing to do is connecting your flash drive to Mac. Launch Disk Utility that you can find under Applications -> Utilities.Find your flash drive name from the left pane side of Disk Utility. Click on the “Erase” tab.

- In “Format” section choose “Mac OS Extended” Name the drive however you like. Then a Window will appear asking if you want to erase the disk, Click “Erase“. That’s it!