Broadcom Wifi can’t find wireless networks [Fix]
There are many reports from users who upgrade their computer to Windows 10 and now are unable to find any wireless networks. Therefore, they can’t connect to the internet. This a huge issue as for most tasks both: work and entertainment you have to have an internet connection.
Broadcom is a widely known Wi-Fi chip or adapter manufacturer. You can find Broadcom products in laptops, tablets, Android smartphones as well as iPhones. With the new Windows 10 upgrade, this chip might not work properly. This is mainly due to driver incompatibility. We have created this article to help you fix this error and let you gain your internet access. There are two main solutions that might help you. So let’s not waste any more time and fix it!
Solutions to similar network errors:
- Wi-Fi adapter not working on Windows 10
- How to fix weak Wi-fi signal on Windows 10
- Windows 10 can’t connect to this network
- Network protocol missing on Windows 10
1. Upgrading your adapter drivers
The cause of your PC not being able to find wireless networks may lie in driver incompatibility. This is a very common cause of this error and can be fixed very easily. All you have to do is install latest drivers. If you have a built-in Wi-Fi card(in the motherboard), you should the latest drivers for your motherboard. However, if you have a dedicated WiFi card or adapter, you will have to download drivers directly from adapters manufacturer. Downloading latest drivers that are optimized for Windows 10 could help. How to do it? Follow steps below:
- The first thing you will have to do is find driver setup file and right-click it. From the menu choose Properties. Once in Properties, go to Compatibility tab.
- You should be able to find text “Run this program in compatibility mode for”. Choose Windows 8 from the list. Click OK and Apply to save all changes. Once done, run the setup.
Now your WiFi card on Windows 10 should run just as good as it did on your previous Windows version – Windows 8.
You might also want to try to update your Network adapters, drivers. To do so, follow steps below:
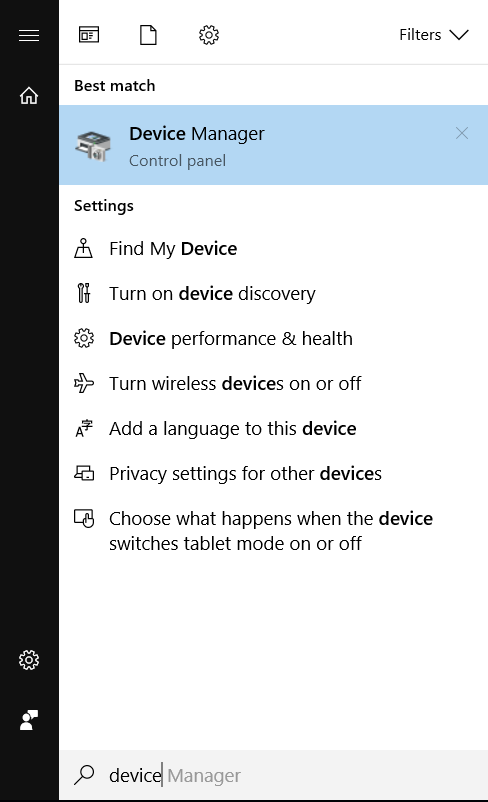
- First, you have to open Device Manager. This can be done by clicking on the Start button and typing in Device Manager. When you start to type, at some point you will see an icon with PC peripherals and lettering “Device Manager” and sub lettering of Control Panel. Click on it. A faster way to access it by pressing Windows Key + X.

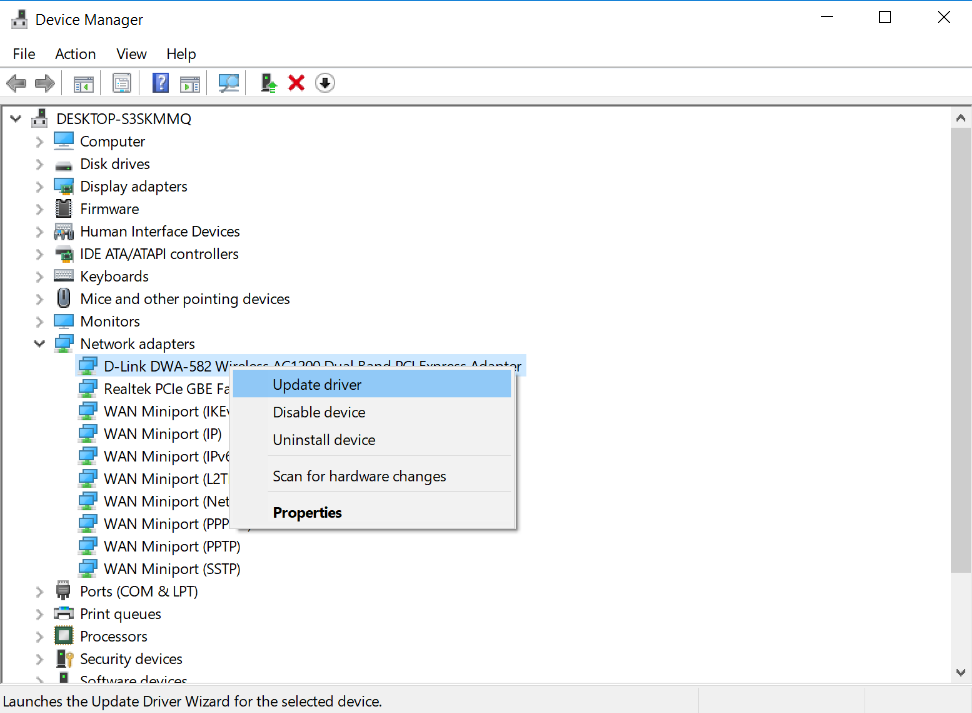
- Now you will have to find Network adapters. Then locate your network adapter and right-click it, press “Update driver“.

- If updating driver didn’t help, you may want to uninstall driver completely so that with next Windows 10 launch it automatically installs default wireless driver. To do so click Uninstall device. If you get asked to “Delete the driver software for this device,” click Ok.
- Restart your computer and check if your PC can find any wireless networks, if not see our next solution.
2. Disabling unsupported VPN software
When you upgrade from Windows 8 to Windows 10, you might end up with an unsupported VPN software. To see any wireless networks, you will have to disable it or do an uninstall. This can be done by executing several commands on Comand Prompt. See steps below:
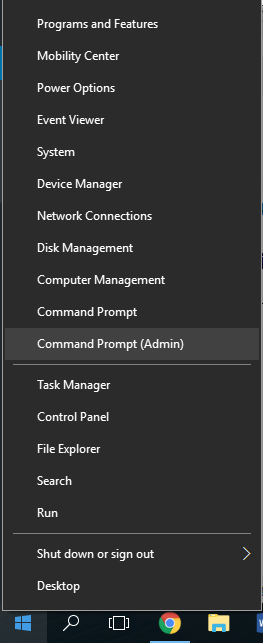
- Open Command Prompt. (To access command prompt, click start and type cmd or Command Prompt. You can also open it bt right-clicking on Windows icon that’s located in the toolbar. Then choose Command Prompt (admin).

- Now you will have to enter the command: netcfg –s and hit Enter. Now you should see a list of services, drivers and networking protocols.
- Look for DNI_DNE in the list. If you find it, go to next step. However, if you don’t, this solution won’t help.
- Enter the following command in Command Prompt and hit Enter:
reg delete HKCR\CLSID\{988248f3-a1ad-49bf-9170-676cbbc36ba3} /va /f - Then enter the command:
netcfg -v -u dni_dne - Restart your PC to see if the error is fixed.
Conclusion
We hope that one of these two solutions helped and now you can find and connect to a wireless network on your computer. However, if you didn’t succeed, we advise getting a special software that could fix this error, so you don’t have to. A good choice is DriverAgent Plus. This software automatically detects and installs all drivers you need. It starts scanning your PC and then offers you to download drivers. It’s a great software to have if you feel frustrated or simply don’t want to waste your time and nerves.

![How to Sync Xbox One Controller? [Explained]](https://hddmag.com/wp-content/uploads/2017/07/how-to-sync-xbox-one-controller-768x512.jpg)